1-blank2 home house on sunflower lane2 about house on sunflower lane3-contact-house-on-sunflower-lane4 tutorials house on sunflower lane5 advertise house on sunflower lane6 blog roll house on sunflower lane7-blank
Showing posts with label Interior Design. Show all posts

Friday, May 30, 2014

DIY Entertainment Center

I have been dying to not only do this project once I found it on Pinterest, but dying to share it with everyone. The only thing that has stopped me is that I wanted my house to look like other bloggers, like they live in a magazine, but with two toddlers, 2 dirty, hairy mutts, and a husband that works more hours than he's home, that just never happens.

So. I have decided that on my blog, we're gonna keep it real.


Like this. We keep our cords taped down with ACU duct tape and have paint splatters on the floor. 

Judge me.

With that said, I would like to introduce you to our newest DIY project (and I say our because I pretty much just shopped for the pretties on it)...


Before I go any further on how this beauty came about, I must give credit where credit is due. I found this on Pinterest, here. When I found it, I knew I had to have it. After a little convincing from the husband, a trip down from my father in law, and as hopping trip with my mother in law, this little beauty became mine.

Just a quick before that I snapped while we were putting painters tape on the wall to mark off where we wanted the shelves to go.


You can also get an idea from this photo


We have been using this little entertainment center that I picked up from someone in Germany and spray painted black. For a 20' wall, it definitely didn't fit the room.

I gave Mat two options, one was the one that we did, and the other was a big, massive entertainment center with the huge cabinets. With how small our living room is (even though, in this picture there are 5 adults (#6 is me behind the camera), 4 kids and 6 dogs), he figured that would be too bulky. So.. The shelves it was!

We did our shelves a little differently than the inspiration found online. They used metal brackets, and we used wood. We bought 1x12 pine boards that we painted white. The bottom boards are 10' and the two smaller ones are just under 3' long.

My FIL then took scrap board and nailed to the underside of the shelves to make brackets. They were spaced evenly along the boards to line up with our studs.


You can see that in the photo above, and below. We painted them the same color as the wall so they would blend in.


I had been real skeptical about how this was really going to work out. I couldn't really picture it in my mind, and I was really nervous. My MIL took me out shopping and when I came home and saw what had been done, I was so happy.

I'm pretty sure there was joy.

And jumping.


My loving and patient husband hooking up our entertainment systems (that frustration is coming).

Before anyone asks, we used decorative hooks instead of the hooks the original poster used, and we also used a decorative rubbed bronze chain instead of the heavy duty chain.

The hooks ARE screwed into the drywall for extra support.


Notice the paint job? I told you. We keep it real.


We used the eye hooks on the shelf and hooked the chain through it. We will eventually close the chain...

Once we find the pliers.

My husband put our satellite receiver and dvd player on the shelf and even though the boxes measured right at 12", they still hung off because of the cords. With two toddlers, I could only imagine one of them running along and knocking it off.

To fix this problem, this was the solution.


They found a scrap piece of wood up in our attic, cut it to be just a little longer than the systems, rounded the corners, nail glued it on the front, and then secured it with metal brackets on the bottom.


Unless you are right up on it, it looks amazing and like it was originally part of the design.

While I was out buying our TV mount, we stumbled across these really cool things from Patronics. There is this piece that sticks your wall and then you smush all of your cords in it, then take the cover and cover it. I have tried to find them online, but can't. If I do, I will share it with you. We painted them the same color as the wall so it blends in.

I still have some more cords to hide, and I will be looking for a box like the person in the inspiration link, but until then, we have cords.

Again.

Keeping it real.

As if the big box of toys didn't give that away.

But there you have it. It was easy. Simple. And it cost me $90 (minus all of the goodies I bought for the shelves).

You can't buy a real wood entertainment center for that anymore!

Tuesday, May 27, 2014

June Goals

I have decided that I want to have goals each month on what to accomplish in my house. This weekend, we knocked out two big projects that had been on my list and now I am completely motivated to get more done.

My husband gave me a budget of only $100 for home stuff this month (not nice! haha) and with it, I plan to paint, put in new hardware, and hang shelves in our tiny hall bathroom and organize our measuring cups and pantry.

I also have one other project in the works but since I already bought that stuff yesterday, I'm not counting the $11 I spent for June's budget.

Because that's just how I do things!

When we bought the house, my sister insisted that the towels in this bathroom be a dark purple, her school's colors. I finally gave in because really... Who doesn't like purple?


We decided to go with a very very very very very light, key lime pie green color.


I know this is a terrible picture, but it's called Classic Key Lime by Glidden. It looks a lot brighter here than it is.

At least I'm hoping!


These will be made. I already have the wood cut, it's an aged wood, but it's not aged like I would like. I don't know yet if I will paint them, stain them, age them, all of the above, etc.

I do have boards already cut for shelves. My original plan was to suspend them with chain but I now have shelves suspended by chain elsewhere in my house (that's one of the projects I was talking about earlier! EEK!), and I don't want to do it again. We will see. I'm still scouring Pinterest for ideas and have a couple, it will just come down to budget.

I need a towel holder. And I have a couple of ideas in mind, I'm just at a loss as to which one I want to do. 


I was originally leaning towards this idea because it's different but I'm not in love with it.

Then I thought I wanted this:


but I worry that it would be too much wood for such a small bathroom.

Then I found this:


It's definitely different but I like it. And I think if done right, I can combine the three things I like from each and make one that I love.

Those are my plans for the bathroom, so far. And if all goes well, should be completed in the next two weeks. Once this bathroom is done, our entire downstairs (except the master bedroom because that's a massive undertaking) will be done and painted. We have accomplished a lot since we moved in 13 months ago, and I am super proud of how our little fixer upper is coming together.


Friday, May 16, 2014

Being Optimistic - My "I Did It" List

My husband returned home just two short months ago. During the deployment, they had made mention to be prepared to leave again in a year after they got home.

Turns out that isn't a rumor.

In one year, my husband will leave again for another 9 months. They aren't calling this a deployment but a training mission.

A 9 month training mission.

In Korea.

I could easily let this get me down. We were looking forward to the 2 years of dwell time after a deployment, but with the luck my husband has already had in his 13 years in, I'm not surprised.

I'm not exactly happy but there is nothing I can do. Instead of living in my own little pity party world, I'm changing my outlook.

I have spent the morning looking at photos of all that I accomplished during his last 9 months that he was gone. I am walking around seeing how much my house changed in those short months.

For those new readers, we bought a fixer upper with every intention to fix it up. I didn't get a whole lot on my list done, but I did get more than I could have ever imagined with all of the things Murphy's Law threw at me along the way...

Plus two toddlers.

While it's still a little early to start working on my next deployment to-do list, this is my "I did it" list.

Insert claps, whistles and whoohoos here!

The day my husband left for his deployment, I came home from dropping him off to find two beautiful things.

1. My 80s light fixture was gone and it was replaced with the light that Mat and I picked out the night before he left.

 And two. A dog door.
I can't really say that I did this, my father in law is amazing, however, I did pick them out... So that counts, right?


The first picture shows what our system for the kids shoes was. Not exactly efficient. This shelf now houses all of the kids shoes and it's right in front of the garage so that when we come in, shoes can be dropped. One day, when the kids are older, their shoes will go upstairs in their room, but for now, this works perfect as our little catch all. The board has hooks for our jackets, purses, dog leashes, etc.


This past deployment, I wanted to be a problem solver. And one of my problems was that I had all of these super cute bras and they were getting squished in a drawer. I found this DIY bra organizer and knew that I had to have it. It was simple and inexpensive.

And it works.

This project almost didn't make the cut. I had bought the paint for it, but I was running out of time. I kept saying I needed to do it, I needed to do it, and one day, I did. With just a couple of days before Mat came home, I knocked it out. And while that open spot is still renters poop brown, something will be done with it eventually.

The stair rail got a new facelift. The hand bar will eventually. I'm just dreading trying to figure out how to do it.

Whatever you do though, don't look underneath. That part isn't exactly done yet.

MY front door got a makeover. This is definitely one of my favorite changes. I love the color!

One of my goals will be to change the kick plate to match the door handle!

Even the doors inside weren't safe. All of the inside doors on the 1st floor got a makeover.

The laundry room was the greatest transformation. It got a fresh coat of paint, a new washer and dryer and a tack board that I covered in fabric.

Eventually, once we get it cleaned out, the garage will be where we come in and out of the house the most, so this will be where we put all of our memos and notes.

And let's not forget my laundry room sorter. It is perfect for small laundry rooms! And when we come in the garage, there aren't baskets of clothes on the floor that need to be washed. The doors open and close without anything in the way.

After a 9 month search, the living room got a Jaxon, Dottie and Harley approved rug.

The playroom got a nice, relaxing blue. The plan was to keep it calm in hopes that it would keep the kids calm.

Didn't work.

These are picture frame/art holders that I made with boards from Hobby Lobby and some clipboard clips. Easy and super cute. The idea in my head was that the blue was like the sky and the frames were clouds.

Before buying our house, it had been a rental so there were a lot of spots like this were neglected. I spent a lot of time fixing them. I'm pretty happy with my handiwork. You can't even tell that there was a whole chunk of wall missing at one point.

The hallways and living room also got a fresh coat of paint. There's my father in law, doing his thing!

We also found time to send lots of care packages to daddy. In this one, he requested his sports medicine books!

I am so happy with how much my house changed while Mat was gone. And now that I have actually sat down and written this post, I'm kind of antsy for him to leave again. I can only imagine what all can be done this time since the kids will be in school for most of the deployment. That leaves me almost 8 hours of uninterrupted toddlers to get stuff done.

Maybe I should start working on that list!

Tuesday, February 18, 2014

Semi-DIY Hanging Burlap Letter


When we bought our house in April, I scoured Pinterest looking for projects that I wanted to do to make our house our home. One of the things I came across were the big wooden monogram letters. I knew that I had to have one.

Source: 1 2 3
I put the project off (like I did many others) but I always regretted not doing it. A few days ago, I was in Hobby Lobby (you would think I live there), and I came across these big, wooden, chevron letters that they had on sale for 50% off.

If it's on sale, I have to have it :)
The letter was perfect, it was already painted, chevroned, and aged. The only thing it was missing was something to hang it with. Sure it had the hanging holes on the back for nails but this was going on an empty wall and just an N would be pretty boring.

Big empty wall.


I picked up some burlap ribbon while I was at Walmart shopping for another project. The ribbon was originally for that project but I decided that it would work better for this project. I also picked up some E6000 glue because why not?

So.. I had my supplies.


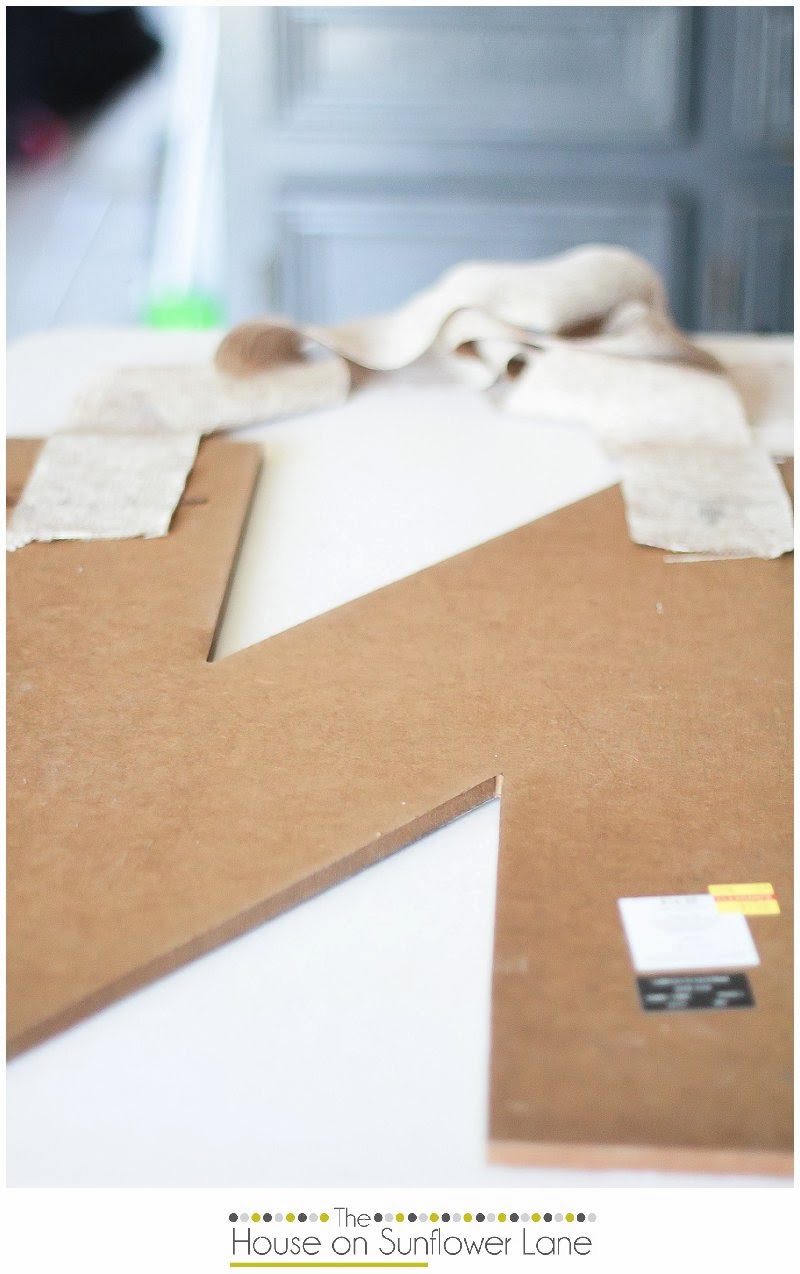
This is a really simple project since it's only semi-DIY. The first step was cut two pieces of the burlap ribbon into two pieces that were equal in size, then I glued one to each side of the back of the letter with the E6000 glue.


Then, since I can't make a bow, I tied a really tight knot in the two pieces of burlap ribbon. (this will be hanging directly about my computer, I refuse to take any chances of this sucker falling!)

The next step is the hardest, the glue says to let it dry and set for 24 hours.

Longest. 24. Hours. Of. My. Life.

Once it was dry, I went up to the loft, leaned over, feared for my life, put a nail in the wall, and hung this beauty up!


I am so happy every time I finish a project. It gives me a sense of accomplishment. I also like knowing that I am investing in our home, we own it, and I want to make it feel like ours.

Any new projects happen this week for you?

Monday, February 17, 2014

What a Wirlwind

Do you ever feel like you're just drowning and you can't seem to come back up?

Yep, I am totally there. It's not a bad whirlwind, I really just feel like I can't keep up on housework. I feel like all I am doing is cleaning and then the Twinkie Tornado comes and destroys it all, and then I am left to clean it all up again.

I'm in that phase where homecoming is so close you can almost touch it, but so far away that it really starts to just annoy you.

My inlaws came down this weekend and the only thing we accomplished was a whole lot of shopping and cleaning out my garage. My garage was really bad, you couldn't even open the door that goes into the garage. I can now park my pretty massive SUV in there!

I found these ugly green things at Hobby Lobby. They were on sale for $4.50 and I saw a lot of potential in them. 

Pretty ugly, eh?
Now they look like chocolate. Please don't judge my mantle, it's a work in progress :)

Remember the pre-deployment photos I posted about? I got them printed professionally and I am so incredibly in love with them.

These are 10x13's and a very important piece of a very special project that I'm working on. It's not going quite the way I had hoped but I have now made plan C!

8x10s and 4x6s. My poor frames had been so neglected and now they're all filled up with new pictures. The last time I had pictures printed, the twins were 7 months old. They're now 3 1/2. Whoops!
And this is what happens when you let Hayley pick which picture goes in what frame. Someone is clearly in love with herself :)

Let's see... What else?

Not only do the kids have their homecoming signs done, mine are 98% done. just need to glitter it up! This was a group Facebook effort to decide what would be appropriate and I am so thankful for my friend Megan who told me to use the phonetic alphabet.

My lovely 3 year old put my new jeans on and said, "Look mom, they fit," and then proceeded to hop around the house like they were a sack of potatoes. Crazy girl.
My husband and I recently had our photo in Times Square as part of the Axe Kiss for Peace Campaign. It was pretty cool to see our photo in Times Square. PS You can follow me on Twitter, here
Went on a small shopping spree with a friend and stopped at Buffalo Wild Wings for some lunch. Took a selfie with the boy!

The blonde is mine :) This is how the boys felt about our shopping trip. Can you believe that my kid is older than my friend's son by a couple of weeks yet, he's such a shrimp compared to him! haha
It's the year of the owls and I made a couple of owl purchases this week! Everything but my new welcome mat came from Hobby Lobby, the welcome mat came from Walmart!


And last but definitely NOT least, our trip to Jamaica has been booked. You can read about how and why we chose Jamaica here. We decided to go on this trip a few weeks ago and narrowed it down to Sunset at the Palms in Negril, Jamaica. We didn't want to book because Mat's time frame to come home keeps changing pretty drastically, not just a few days, but by weeks. Every time I would check websites to check price and availability, the price kept going up and one website even showed that they had no availability. I was starting to get severely depressed. This is the resort we wanted. We had to have it. Finally, I called our FRG leader, told her what dates we were looking at, and she told me that they had a cruise booked for the exact same dates that Mat and I had been thinking about. That was enough, we booked it, bought the insurance, and I was even able to schedule my massage. That was mandatory! :) Now we're just talking about what we want to actually do in Jamaica. I can not wait to share this trip with everyone!

I am hoping things slow down a bit so I can keep this ol blog updated more often, but with it being this close to homecoming, I'm not making any promises :)